
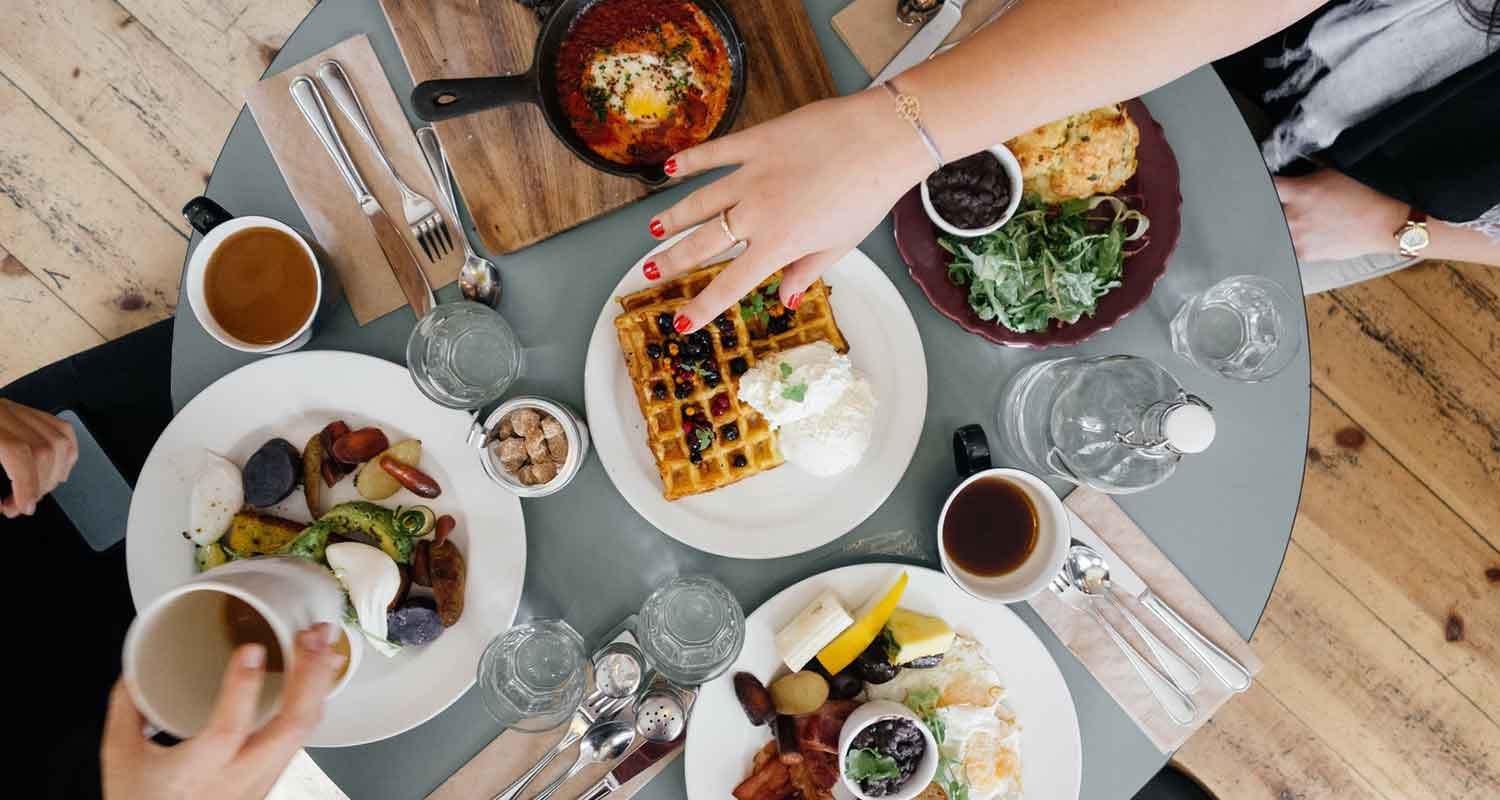
Creamy Avocado Toast — Perfectly Creamy & Crispy!
Crispy golden toast topped with creamy mashed avocado, fresh cherry tomatoes, chilli flakes, and a touch of lemon—simple, fresh, and absolutely delicious!
Perfect for a quick breakfast, lazy brunch, or healthy snack. Ready in just 10 minutes and completely customizable with your favorite toppings.
Save this easy avocado toast recipe for your next breakfast!
Ingredients
For the Avocado Spread
- 1 ripe avocado
- 2 slices of sourdough or whole-grain bread
- 1 teaspoon lemon juice
- Salt, to taste
- Black pepper, to taste
- ¼ teaspoon chilli flakes
- 1 teaspoon olive oil
Optional Toppings
- Cherry tomatoes, halved
- Feta cheese
- Fresh coriander or parsley
- Sesame seeds
- Chilli flakes
- A little honey or chilli oil
- Poached or boiled egg
How to Make Avocado Toast
1. Toast the Bread
Start by toasting your bread until the edges become golden and crispy, while the center remains slightly soft. Sourdough works beautifully, but you can use any bread you enjoy.
For an extra-rich flavor, brush the bread lightly with olive oil before toasting.
2. Prepare the Avocado
Cut the avocado in half, remove the seed, and scoop the flesh into a bowl. Add lemon juice, salt, and black pepper.
Mash everything gently with a fork. Don’t make it completely smooth—leaving a few small chunks gives the avocado a lovely homemade texture.
3. Add the Creamy Layer
Spread the mashed avocado generously over your warm toast. Let it reach all the way to the edges for that beautiful café-style look.
4. Add Your Favorite Toppings
Now comes the fun part! Add halved cherry tomatoes, a little feta cheese, chilli flakes, and fresh herbs.
For a richer breakfast, top it with a perfectly cooked egg. A few sesame seeds or a tiny drizzle of chilli oil can also make the toast look extra special.
5. Finish & Serve
Finish with a small drizzle of olive oil, a squeeze of fresh lemon, and an extra pinch of chilli flakes.
Serve immediately while the toast is still crisp.
A bowl of cozy, smoky goodness
Rich tomatoes, hearty beans, sweet corn, and warm spices come together in this comforting Smoky Chili. Slow-simmered, flavorful, and finished with a fresh squeeze of lime.
Perfect for cozy evenings, lazy weekends, and anyone who believes comfort food should be full of flavor.
Ingredients
- 2 tbsp olive oil
- 1 medium onion, finely chopped
- 3 cloves garlic, minced
- 1 bell pepper, diced
- 1 cup corn
- 1 cup cooked kidney beans
- 1 cup cooked black beans
- 1½ cups crushed tomatoes
- 1 tbsp tomato paste
- 1–2 tsp smoked paprika
- 1 tsp cumin powder
- 1 tsp chili powder
- ½ tsp oregano
- ½ tsp black pepper
- Salt, to taste
- 1 cup vegetable broth or water
- 1 tsp soy sauce
- 1 tsp maple syrup or brown sugar
- Fresh coriander, for garnish
- Lime wedges, for serving
Method
- Sauté the aromatics: Heat olive oil in a large pot over medium heat. Add chopped onion and cook for 3–4 minutes until softened.
- Add vegetables: Stir in garlic and bell pepper. Cook for another 2–3 minutes.
- Build the smoky flavor: Add smoked paprika, cumin, chili powder, oregano, and black pepper. Stir for about 30 seconds until fragrant.
- Add tomatoes: Mix in tomato paste and crushed tomatoes. Cook for 2–3 minutes.
- Add beans and corn: Stir in kidney beans, black beans, and corn.
- Simmer: Pour in the vegetable broth. Add soy sauce and maple syrup. Bring to a gentle boil, then reduce the heat and simmer uncovered for 25–30 minutes, stirring occasionally.
- Adjust the taste: Add salt and extra chili powder if needed. For a thicker chili, lightly mash some of the beans with the back of your spoon.
- Serve: Spoon the hot chili into bowls and garnish with fresh coriander. Finish with a squeeze of lime.
Herb Roasted Chicken — Golden, Juicy & Full of Flavor!
Tender roasted chicken infused with garlic, rosemary, thyme, and lemon, finished with beautifully crisp golden skin. Served with roasted vegetables for the ultimate comforting dinner.
Perfect for a cozy family meal, Sunday dinner, or an elegant homemade feast!

Ingredients
For the Chicken
- 1 whole chicken, about 1.5–2 kg
- 3 tbsp softened butter
- 1 tbsp olive oil
- 5–6 garlic cloves, minced
- 1 tsp dried oregano
- 1 tsp dried thyme
- 1 tsp dried rosemary
- 1 tsp paprika
- 1 tsp black pepper
- 1½ tsp salt
- 1 lemon
- 1 small onion, quartered
- Fresh rosemary and thyme for garnish
For the Roasting Pan
- 2 carrots, roughly chopped
- 2 potatoes, cut into chunks
- 1 onion, sliced
- ½ cup chicken stock or water
- 1 tbsp olive oil
- Salt and pepper, to taste
How to Make Herb Roasted Chicken
1. Prepare the Chicken
Pat the chicken completely dry using paper towels. Place it in a roasting pan or baking dish.
2. Make the Herb Butter
In a small bowl, mix softened butter, olive oil, minced garlic, oregano, thyme, rosemary, paprika, black pepper, and salt.
3. Season Generously
Rub the herb-butter mixture all over the chicken. If possible, gently loosen the skin over the breast and spread a little butter underneath it for extra flavor and moisture.
Squeeze half of the lemon over the chicken. Place the remaining lemon half and quartered onion inside the chicken cavity.
Let the chicken rest for about 30 minutes so the flavors can develop.
4. Prepare the Vegetables
Arrange chopped carrots, potatoes, and onion around the chicken. Drizzle them with olive oil and season with salt and pepper.
Pour the chicken stock into the bottom of the pan.
5. Roast
Preheat the oven to 200°C (400°F).
Roast the chicken for approximately 1 hour 15 minutes, depending on its size. Baste it once or twice with the juices from the pan while roasting.
The chicken is safely cooked when the thickest part reaches 74°C (165°F) on a food thermometer.
6. Rest Before Serving
Remove the chicken from the oven and let it rest for 10–15 minutes before carving. This helps keep the meat juicy.
Garnish with fresh rosemary, thyme, and lemon wedges.
Crispy Tacos That Bring the Crunch!
Golden, crunchy taco shells loaded with flavorful beans, sweet corn, fresh veggies, melted cheese, and a creamy homemade sauce. Every bite is crispy, cheesy, fresh, and seriously delicious!
Perfect for a quick dinner, weekend treat, party platter, or Mexican-inspired food night.

Ingredients
For the Filling
- 1 cup boiled kidney beans or black beans
- 1 cup sweet corn
- 1 small onion, finely chopped
- 1 small capsicum, finely chopped
- 1 tomato, finely chopped
- 1 tbsp oil
- 1 tsp cumin powder
- 1 tsp paprika or red chilli powder
- ½ tsp oregano
- ½ tsp garlic powder
- Salt, to taste
- 1 tbsp tomato salsa
For the Tacos
- 8 crispy taco shells
- 1 cup grated cheese
- ½ cup shredded lettuce
- ½ cup diced tomatoes
- ¼ cup sliced jalapeños
- Fresh coriander, for garnish
For the Creamy Sauce
- ½ cup mayonnaise
- 2 tbsp yogurt
- 1 tbsp lime juice
- ½ tsp chilli flakes
- A pinch of salt
How to Make Crispy Tacos
1. Prepare the Filling
Heat oil in a pan over medium heat. Add the chopped onion and capsicum and sauté for 2–3 minutes until slightly softened.
Add the tomatoes, kidney beans, sweet corn, cumin powder, paprika, oregano, garlic powder, and salt. Mix everything well and cook for another 4–5 minutes.
Stir in the tomato salsa and cook for another minute. Turn off the heat and let the filling cool slightly.
2. Make the Creamy Sauce
In a small bowl, combine mayonnaise, yogurt, lime juice, chilli flakes, and salt. Mix until smooth and creamy.
For a fresher flavor, add a little chopped coriander.
3. Fill the Tacos
Arrange the crispy taco shells on a serving plate or baking tray.
Add a spoonful of the warm bean and corn filling into each shell. Don’t overfill them, or they may become difficult to eat.
Top with grated cheese, shredded lettuce, diced tomatoes, and jalapeños.
4. Make Them Extra Crispy
For a warm, melty finish, place the filled tacos in a preheated oven at 180°C (350°F) for about 5–7 minutes, just until the cheese melts.
Keep an eye on them so the shells don’t become too dark.
5. Add the Finishing Touch
Drizzle the creamy sauce over the tacos and sprinkle with fresh coriander.
Serve immediately with lime wedges and extra salsa on the side.
Easy Variations
Cheesy Tacos: Add extra mozzarella or cheddar for a gooey filling.
Paneer Tacos: Replace the beans with small cubes of spiced grilled paneer.
Chicken Tacos: Add cooked shredded chicken seasoned with cumin, paprika, garlic, and lime.
Spicy Tacos: Add chopped jalapeños or a little hot sauce to the filling.
Fresh & Light: Add avocado, cucumber, lettuce, and fresh salsa for extra freshness.
Mini Biscoff Cheesecake
Creamy, dreamy, and packed with that delicious caramelized Biscoff flavor, these Mini Biscoff Cheesecakes are the perfect little dessert for any occasion. With a buttery Biscoff biscuit base, smooth cheesecake filling, and a glossy Biscoff spread topping, every bite feels like a café-style treat made at home.

Ingredients
For the Biscoff Base
150 g Biscoff biscuits
55 g melted butter
For the Cheesecake Filling
225 g cream cheese, softened
½ cup heavy whipping cream
⅓ cup powdered sugar
½ cup Biscoff spread
1 tsp vanilla extract
½ tsp lemon juice
For the Topping
⅓ cup Biscoff spread
3–4 Biscoff biscuits, crushed or broken into pieces
Optional: whipped cream for decoration
Method
1. Make the Biscuit Base
Crush the Biscoff biscuits into fine crumbs. Mix them with melted butter until the mixture resembles wet sand.
Divide the mixture between 8 small dessert cups or mini cheesecake molds. Press firmly using the back of a spoon or the bottom of a small glass.
Chill the bases for about 15–20 minutes.
2. Prepare the Cheesecake Filling
In a bowl, beat the softened cream cheese until smooth and creamy.
Add powdered sugar, Biscoff spread, vanilla extract, and lemon juice. Mix until everything is well combined and silky.
In another bowl, whip the heavy cream until it forms soft peaks. Gently fold the whipped cream into the cheesecake mixture. Avoid overmixing so the filling stays light and fluffy.
3. Assemble
Spoon or pipe the cheesecake filling over the chilled Biscoff bases. Smooth the tops with a spoon or spatula.
Refrigerate for at least 4–5 hours, or preferably overnight, until firm and set.
4. Add the Biscoff Topping
Warm the Biscoff spread slightly until it becomes smooth and pourable. Don’t make it hot.
Add a thin layer over each cheesecake and gently spread it across the top.
Finish with crushed Biscoff biscuits and a small swirl of whipped cream if desired.
Korean Creamy Garlic Noodles
Creamy, garlicky, slightly spicy, and packed with Korean-inspired flavors, these Korean Creamy Garlic Noodles are the perfect comfort food for a cozy night in. The noodles are coated in a silky sauce made with garlic, cream, gochujang, and soy sauce, creating a delicious balance of spicy, savory, and creamy flavors.

Ingredients
For the Noodles
200 g noodles
1 tablespoon sesame oil
1 teaspoon salt, for boiling
2–3 tablespoons reserved noodle water
For the Creamy Garlic Sauce
1 tablespoon butter
5–6 cloves garlic, finely minced
2 tablespoons gochujang
1 tablespoon soy sauce
1 teaspoon honey or brown sugar
½ teaspoon sesame oil
½ cup cooking cream
¼ cup milk
½ teaspoon black pepper
½ teaspoon Korean chili flakes (optional)
For Garnishing
Sliced green onions
Toasted sesame seeds
Korean chili flakes
A drizzle of sesame oil
Crispy garlic, optional
How to Make Korean Creamy Garlic Noodles
1. Cook the Noodles
Bring a pot of salted water to a boil and cook the noodles according to the package instructions. Keep them slightly firm rather than overcooking them.
Before draining, reserve about ¼ cup of noodle water. Drain the noodles and set aside.
2. Make the Garlic Base
Heat butter in a large pan over medium-low heat. Add the minced garlic and sauté gently for about 1–2 minutes until fragrant.
Be careful not to burn the garlic because it can make the sauce taste bitter.
3. Add the Korean Flavors
Add gochujang, soy sauce, honey, sesame oil, and black pepper. Stir everything together until the mixture becomes smooth and aromatic.
For extra heat, add a little Korean chili flakes.
4. Make It Creamy
Pour in the cooking cream and milk. Stir continuously and let the sauce simmer gently for 2–3 minutes.
If the sauce becomes too thick, add a splash of the reserved noodle water.
5. Toss in the Noodles
Add the cooked noodles directly to the pan. Toss thoroughly until every strand is covered in the creamy garlic sauce.
Cook for another 1–2 minutes so the noodles absorb all those delicious flavors.
6. Garnish & Serve
Transfer the noodles to a bowl and finish with sliced green onions, toasted sesame seeds, Korean chili flakes, and a tiny drizzle of sesame oil.
Serve immediately while they’re warm, glossy, and creamy.
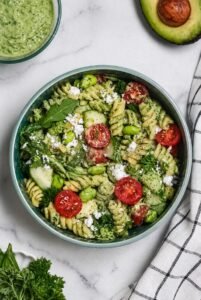
Green Goddess Pasta Salad
Fresh, creamy, herby, and packed with vibrant green goodness—this Green Goddess Pasta Salad is the kind of recipe that makes healthy eating feel exciting. Tender pasta is tossed with crisp vegetables and a creamy homemade green goddess dressing made with herbs, avocado, lemon, and yogurt. It’s perfect for lunch, picnics, potlucks, or a light dinner.
Ingredients
For the Pasta Salad
250 g short pasta such as fusilli or bow-tie
1 cup cucumber, diced
1 cup broccoli, cut into small florets
½ cup green bell pepper, diced
½ cup sweet corn
¼ cup spring onions, chopped
¼ cup fresh parsley or coriander
2 tbsp pumpkin seeds or sunflower seeds
Salt and black pepper, to taste
For the Green Goddess Dressing
1 ripe avocado
½ cup Greek yogurt or thick yogurt
1 small handful fresh parsley
1 small handful fresh coriander
5–6 fresh basil leaves
1 small garlic clove
1 tbsp lemon juice
1 tbsp olive oil
2–3 tbsp water, as needed
Salt and black pepper, to taste
How to Make It
1. Cook the pasta
Bring a large pot of salted water to a boil. Cook the pasta according to the package instructions until tender but still slightly firm. Drain and rinse briefly with cold water to cool it down.
2. Prepare the vegetables
While the pasta cools, chop the cucumber, broccoli, bell pepper, and spring onions. Keep the vegetables fresh and colorful for that beautiful green-goddess look.
3. Make the dressing
Add avocado, yogurt, parsley, coriander, basil, garlic, lemon juice, olive oil, salt, and black pepper to a blender. Blend until smooth and creamy. Add a little water if the dressing feels too thick.
4. Assemble the salad
Add the cooled pasta and vegetables to a large bowl. Pour over the green goddess dressing and gently toss until everything is evenly coated.
5. Add the finishing touch
Sprinkle with pumpkin or sunflower seeds and a little extra fresh herbs. Add a squeeze of lemon for a bright, fresh finish.
6. Chill and serve
For the best flavor, refrigerate the salad for about 15–20 minutes before serving. Serve chilled or slightly cool.
Loaded Masala Fries
Crispy Fries Loaded with Indian Spices, Creamy Sauce & Cheesy Goodness
There’s something irresistible about a big plate of crispy fries covered in bold masala, creamy sauces, cheese, and fresh toppings. These Loaded Masala Fries are the perfect fusion of classic comfort food and Indian street-food flavours. They’re crispy, spicy, tangy, creamy, and incredibly satisfying.
Whether you’re planning a movie-night snack, a weekend treat, or a fun party platter, this easy recipe turns simple fries into something seriously delicious!

Ingredients
For the Fries
500 g frozen French fries
1 tbsp oil
½ tsp Kashmiri red chilli powder
½ tsp chaat masala
½ tsp roasted cumin powder
¼ tsp black pepper
Salt to taste
For the Creamy Sauce
3 tbsp mayonnaise
2 tbsp tomato ketchup
1 tbsp chilli sauce
1 tbsp yogurt
½ tsp garlic powder
A pinch of chilli flakes
For the Toppings
½ cup grated mozzarella or cheddar cheese
¼ cup finely chopped onion
¼ cup chopped tomato
2 tbsp sweet corn
2 tbsp chopped coriander
1–2 tbsp sliced jalapeños
1 tbsp spring onion
How to Make Loaded Masala Fries
1. Cook the Fries
Cook the French fries according to the package instructions until they are golden, crispy, and crunchy. You can bake, air-fry, or deep-fry them.
2. Make the Masala
In a small bowl, mix Kashmiri chilli powder, chaat masala, roasted cumin powder, black pepper, and a little salt.
Toss the hot fries with the masala while they are still warm so the spices stick beautifully to every piece.
3. Prepare the Sauce
Mix mayonnaise, ketchup, chilli sauce, yogurt, garlic powder, and chilli flakes in a bowl. Stir until smooth and creamy.
4. Load the Fries
Spread the crispy masala fries onto a serving plate or shallow bowl. Drizzle generously with the creamy sauce.
Sprinkle the grated cheese over the top, followed by chopped onions, tomatoes, sweet corn, and jalapeños.
5. Add the Final Touch
Finish with fresh coriander and spring onions. For an extra spicy kick, add a little chilli sauce or sprinkle more chaat masala on top.
Serve immediately while the fries are hot and crispy!
Crispy Fries Sushi Bites
Crispy on the outside, creamy in the middle, and seriously fun to eat!
If you love crispy fries and creative snacks, these Crispy Fries Sushi Bites are the perfect combination. Golden fries are wrapped into bite-sized rolls with creamy cheese, crunchy veggies, and a flavorful filling, then sliced into adorable sushi-style pieces. They’re easy to make, incredibly satisfying, and perfect for parties, movie nights, or a fun weekend snack.

Ingredients
For the Crispy Fries
3 large potatoes
2 tbsp cornflour
1 tbsp rice flour
½ tsp garlic powder
½ tsp paprika or red chili powder
Salt, to taste
1 tbsp oil
Oil for frying or air frying
For the Filling
½ cup grated mozzarella or cheddar cheese
¼ cup finely chopped capsicum
¼ cup grated carrot
2 tbsp sweet corn
2 tbsp mayonnaise
1 tbsp chili sauce
½ tsp mixed herbs
Black pepper, to taste
For Serving
Mayonnaise
Sriracha or chili sauce
Spring onions
Sesame seeds
How to Make Crispy Fries Sushi Bites
1. Prepare the Fries
Peel the potatoes and cut them into thin fries. Soak them in cold water for about 15–20 minutes to remove excess starch. Drain and pat them completely dry.
Toss the fries with cornflour, rice flour, garlic powder, paprika, salt, and a little oil.
2. Make Them Extra Crispy
Deep-fry the coated fries until golden and crisp. For a lighter version, arrange them in an air fryer and cook until crisp and golden, turning halfway through.
Let the fries cool slightly before assembling.
3. Prepare the Filling
In a bowl, mix mayonnaise, chili sauce, cheese, capsicum, carrot, sweet corn, mixed herbs, and black pepper.
The filling should be creamy but thick enough to stay inside the rolls.
4. Assemble the Sushi
Place a sheet of parchment paper or cling film on your work surface. Arrange the crispy fries closely together in a rectangular layer.
Spread a thin layer of the creamy filling over the fries, leaving a small border around the edges.
Carefully roll everything tightly using the parchment paper, just like making a sushi roll.
5. Slice Into Bites
Chill the roll for about 10 minutes to help it hold its shape. Carefully remove the parchment and slice the roll into small, bite-sized pieces.
Arrange the pieces on a serving plate.
6. Add the Finishing Touch
Drizzle with mayonnaise and chili sauce. Sprinkle with sesame seeds and chopped spring onions.
Serve immediately while the fries are still crispy!
The Ultimate Chocolate Mug Cake
5 minutes. One mug. Zero complicated baking.
When the chocolate craving hits, this is the recipe you want. This Chocolate Mug Cake is soft, fudgy, deeply chocolatey, and made with simple ingredients you probably already have in your kitchen.
No oven. No mixer. No waiting for a whole cake to bake. Just mix, microwave, and grab a spoon.

You’ll Love It so muchh!
Super chocolatey and rich
Made in one mug, so cleanup is minimal
Ready in minutes
Soft and fudgy instead of dry and cakey
Easy to customize with your favorite toppings
Ingredients
4 tbsp all-purpose flour (maida)
2 tbsp sugar
1½ tbsp cocoa powder
¼ tsp baking powder
A tiny pinch of salt
3 tbsp milk
2 tbsp melted butter or neutral oil
¼ tsp vanilla extract
1 tbsp chocolate chips, plus extra for topping
Let’s Make It
1. Mix the dry ingredients.
Add flour, sugar, cocoa powder, baking powder, and salt to a large microwave-safe mug. Give everything a quick stir.
2. Add the wet ingredients.
Pour in the milk, melted butter or oil, and vanilla. Stir until you have a smooth batter. Don’t worry if it looks a little thick—that’s exactly what you want.
3. Make it extra chocolatey.
Fold in the chocolate chips. Add a few more on top because, honestly, there’s no such thing as too much chocolate.
4. Microwave.
Cook on high for 60–90 seconds. Start with 60 seconds and add a few more seconds if needed. The top should look set while the middle stays slightly soft.
5. Let it rest.
Give it a minute to cool down—if you can resist eating it straight away.
The Best Part
Grab a spoon and eat it straight from the mug while it’s warm. For the full dessert experience, add a scoop of vanilla ice cream, a drizzle of chocolate sauce, or a little dusting of cocoa powder.
That warm cake + cold ice cream combination? Absolutely worth it.
My Mug Cake Tip
The secret to a good mug cake is not overcooking it. Every microwave is different, so start with less time. You can always cook it a little longer, but you can’t rescue a dry mug cake.
Quick, chocolatey, and ridiculously easy—this is your sign to make dessert tonight.
Absolutely — here’s a 2026-style aesthetic recipe card: clean, editorial, slightly luxe, and Instagram/Pinterest-friendly.
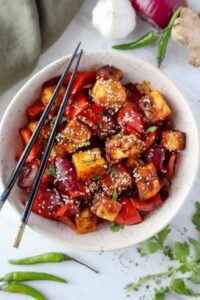
FIERY GOCHUJANG PANEER BITES
crispy • glossy • smoky • unapologetically spicy
Korean-inspired × Indian comfort
golden paneer tossed in a sticky gochujang glaze, finished with sesame + fresh greens.
YOU’LL NEED
PANEER BITES
250 g paneer · cubed
3 tbsp cornflour
1 tbsp rice flour
½ tsp garlic powder
½ tsp Kashmiri chilli powder
Salt
2–3 tbsp water
Oil · for frying
FIERY GLAZE
1½ tbsp gochujang
1 tbsp soy sauce
1 tbsp honey / maple syrup
1 tsp rice vinegar
1 tsp sesame oil
1 tsp minced garlic
½ tsp grated ginger
½–1 tsp chilli flakes
1 tbsp water
FINISH
Toasted sesame seeds
Spring onions
Fresh coriander
Thinly sliced red chilli
✦ MAKE IT
01 · CRISP
Coat paneer with cornflour, rice flour, garlic powder, chilli powder + salt. Add water gradually to create a light coating.
Pan-fry until deep golden + crisp. Set aside.
02 · GLAZE
Add gochujang, soy, honey, vinegar, sesame oil, garlic, ginger, chilli flakes + water to the same pan.
Simmer for 1–2 min until glossy.
03 · TOSS
Return the crispy paneer to the pan. Toss until every cube is lacquered in that fiery red glaze.
Cook for another 30–60 sec.
04 · FINISH
Shower with sesame seeds + spring onions. Add coriander and a few curls of fresh chilli.
HEAT LEVEL
Want it properly fiery?
Add ½ tsp gochugaru or an extra pinch of chilli flakes to the glaze.
SERVE IT LIKE A 2026 CAFÉ
Pile the bites slightly off-center on a matte black or cream plate.
Swipe a little sesame mayo underneath → stack the paneer → scatter sesame + microgreens → finish with 2–3 red chilli slices.
The vibe: minimal plate · maximal flavour · glossy glaze · moody lighting
PAIR WITH: iced sesame latte · sparkling lemonade · cucumber salad
VADA PAV
the little Mumbai sandwich that always hits
Golden batata vada.
Soft, buttery pav.
Fiery garlic chutney.
A little green chutney.
Crispy. Spicy. Comforting. Completely addictive.

YOU’LL NEED
for the vada
4 medium potatoes, boiled & mashed
2 green chillies, finely chopped
4 garlic cloves, minced
1 tsp mustard seeds
½ tsp cumin seeds
8–10 curry leaves
¼ tsp turmeric
2 tbsp coriander, chopped
salt, to taste
1 tbsp oil
for the crispy coating
1½ cups besan
¼ tsp turmeric
½ tsp red chilli powder
pinch of baking soda
salt, to taste
water, as needed
oil, for frying
to finish
6–8 soft pav
dry garlic chutney
green chutney
butter, optional
fried green chillies, optional
MAKE IT
01 · the filling
Heat oil and let the mustard seeds splutter.
Add cumin, curry leaves, green chilli and garlic.
Add turmeric and mashed potatoes. Season with salt, fold in coriander and let cool.
Roll into little golden-worthy potato balls.
02 · the batter
Whisk besan, turmeric, chilli powder, salt and baking soda.
Add water gradually until you have a smooth, thick batter that clings to the potato.
03 · the crispy bit
Dip each potato ball into the batter.
Fry in hot oil over medium heat until deep golden, crisp & beautifully puffed.
Drain and try not to eat one immediately.
(You probably will.)
04 · build your vada pav
Slice a soft pav.
Spread on the garlic chutney + green chutney, tuck in a hot batata vada and gently press.
Add a swipe of butter if you’re feeling indulgent.
SERVE IT HOT
Pile them onto a plate.
Add fried green chillies.
Make chai.
Then take that first bite while the vada is still crackly on the outside and soft in the middle.
This is street food comfort, Mumbai-style. ♡
SAVE THIS ONE
Prep: 20 min
Cook: 25 min
Serves: 6–8
best enjoyed hot, messy & with extra chutney